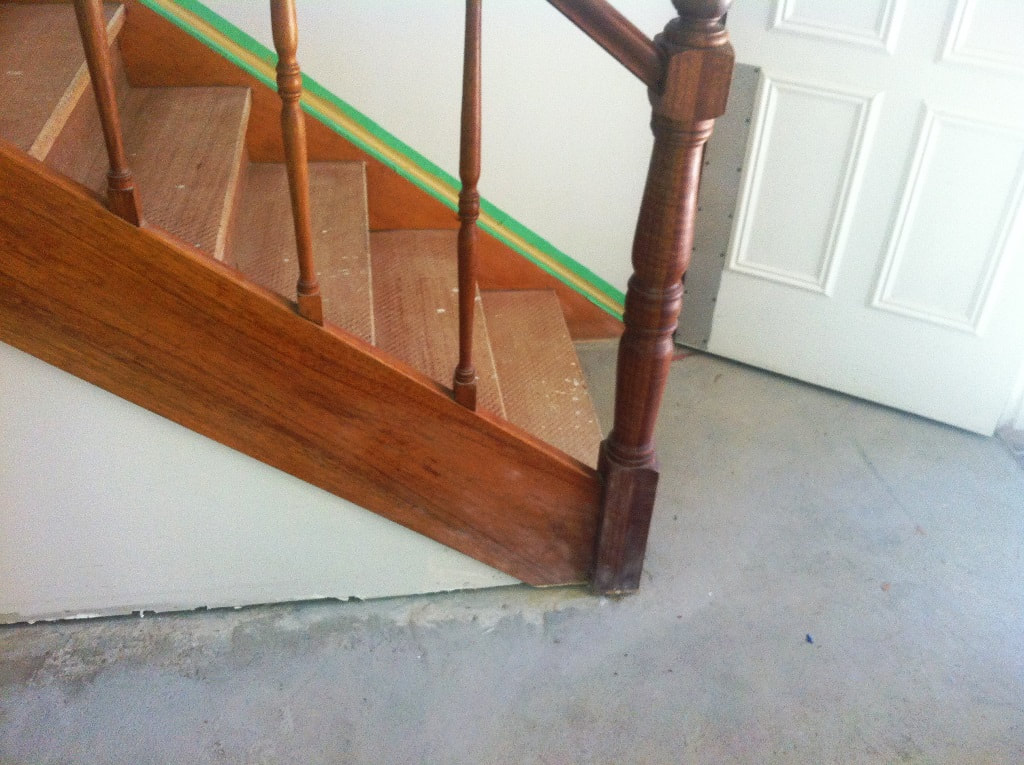
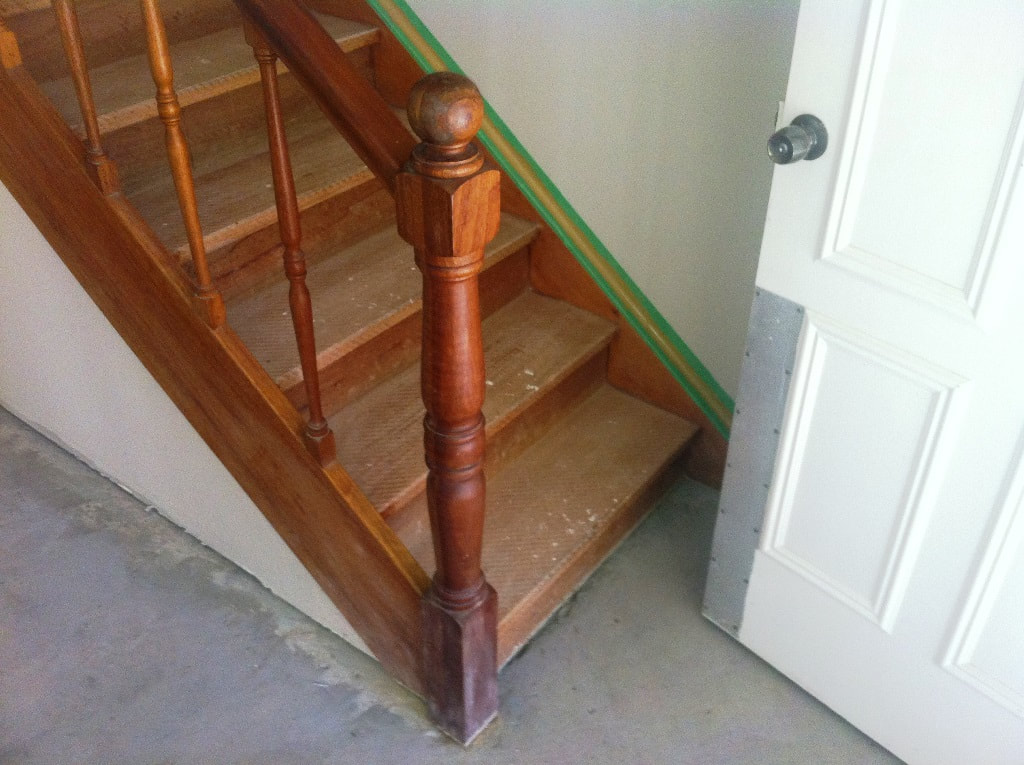
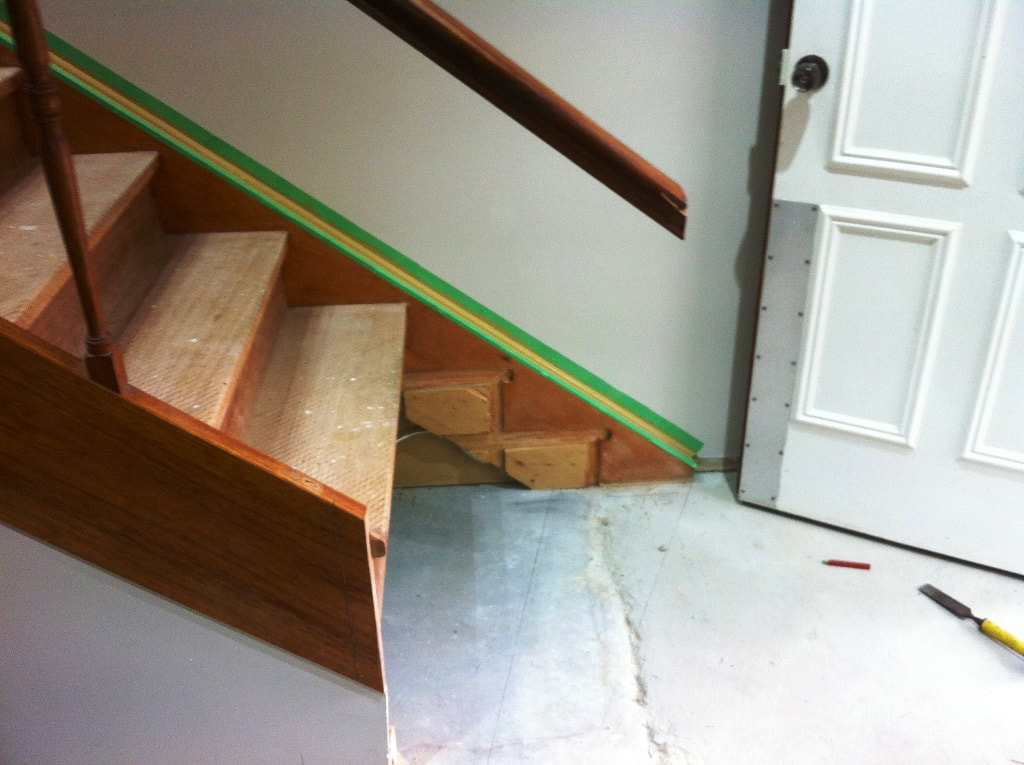
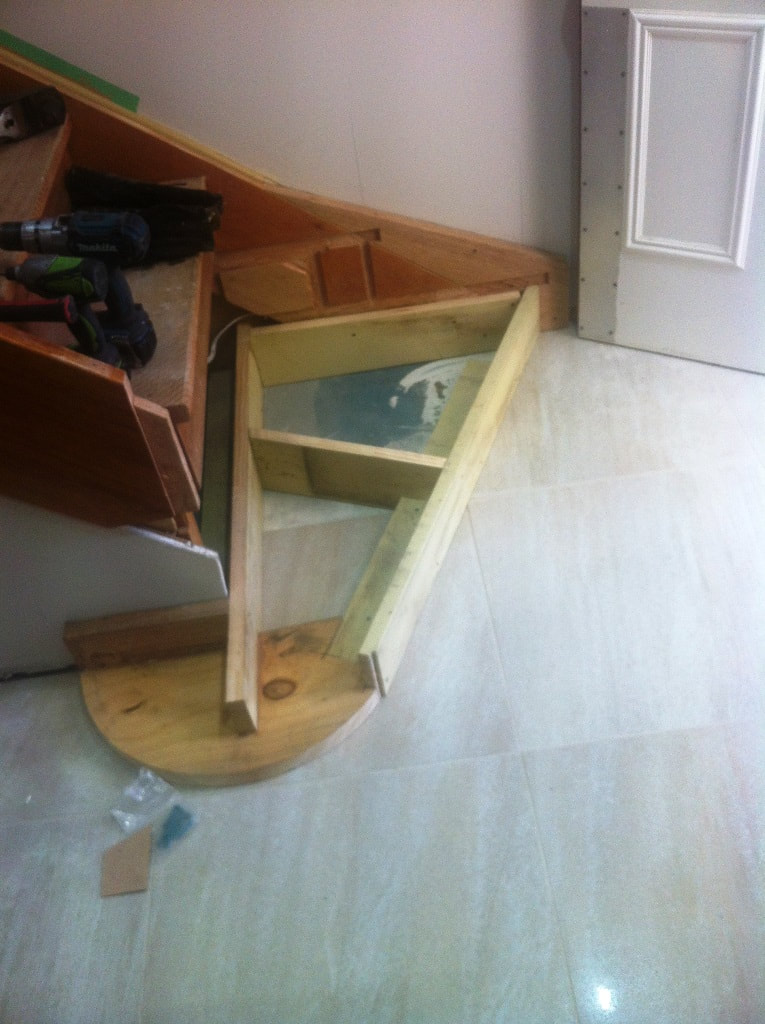
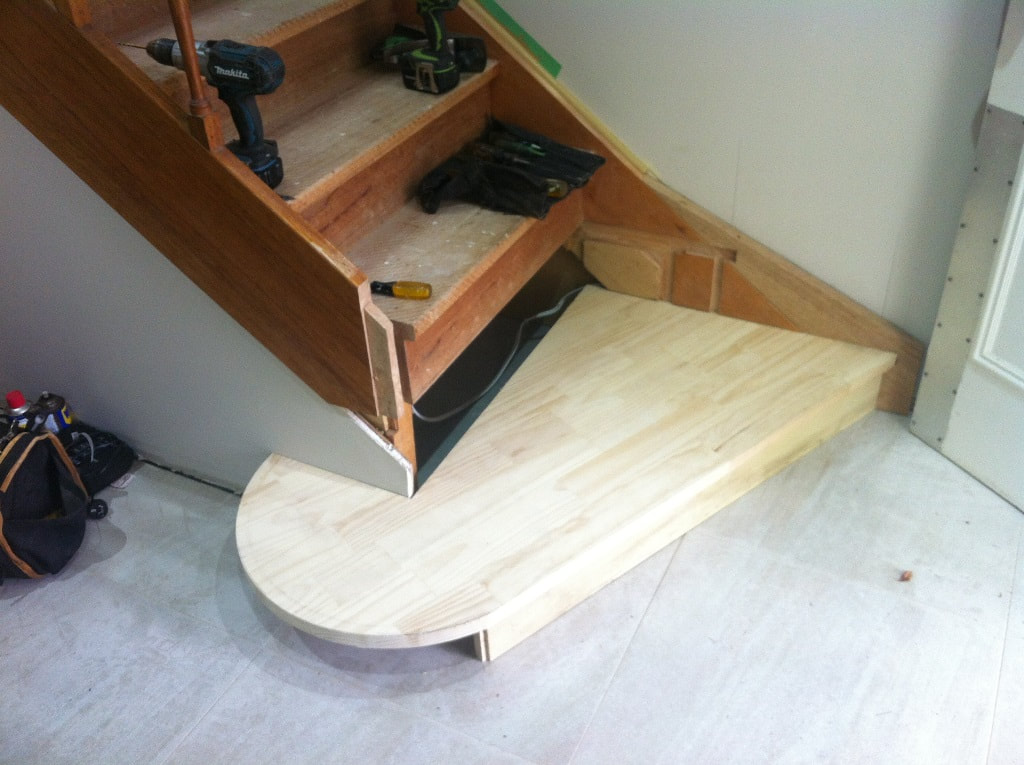
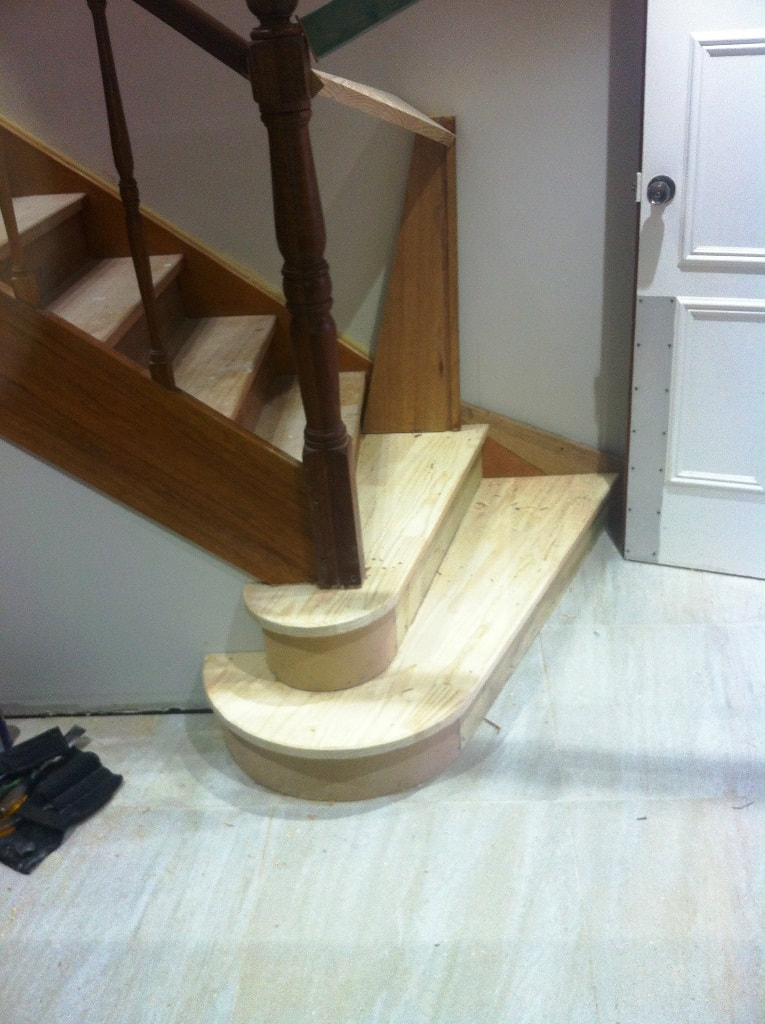
| | We recently did a little modification to an existing set of stairs and thought the exercise may be of interest to some here. We took a few photos before, during & after the works to better explain the process, although some woodworkers may have approached the job a little differently. Others may question why we even bothered with the modifications at all. As background, the works were at a nice property on 14 acres with an existing 2 storey house. The house itself was in OK condition, although during our minor renovation works we did find some significant damage to the lower wall frames from white ant activity - but that's another story. The quality of the images herein is not great, having just used the iPhone - but you get the idea. The configuration of the stairs was poorly thought out in the original construction of the house, making the location of the bottom landing point and the position of the bottom newel post quite awkward at the front entry. The post was situated only 1.0 metre from the double entry doors, and virtually ended up right in the middle of the main door, so that when the door is open it practically closes off half of the stair opening. Not only was it somewhat impractical for accessing the stairs from the living areas of the bottom floor, it just didn't create a very welcoming entry. The stair stringers, treads & risers had been constructed from solid Meranti and were carpeted. The newel posts & balusters were also Meranti with a shaped handrail from Western Red Cedar (for some reason). All of the construction was quite sound but very basic, with the house having been built around 35 years ago. It was intended to re-carpet the whole upstairs area and also the stairs but there was also a strong desire to improve the general configuration at the main entry before the carpet layers arrived. It was decided to remove the two bottom treads and turn them into bull-nosed winders which are accessible from the side, and to then move the bottom newel post up to the base of the third tread. The process to take out the treads & risers was relatively easy, notwithstanding the fact that all the components (including wedges) had been originally glued into place with PVA. It was also intended to tile all of the bottom floor of the house, so it was considered best to get that done prior to completion of the stair modification. Luckily, the newel post seemed to have very little glue in the joint to the stringer and came apart fairly easily, leaving a nice neat mortise on the post. The stair stringers, treads & risers have been constructed from solid Meranti and were carpeted. The newel posts & balusters were also Meranti with a shaped handrail from Western Red Cedar (for some reason). All of the construction was quite sound but very basic, with the house having been built around 35 years ago. We were intending to re-carpet the whole upstairs area and also the stairs but we were determined to improve the general configuration at the bottom before the carpet layers arrived. We decided to remove the two bottom treads and turn them into bull-nosed winders which are accessible from the side, and to then move the bottom newel post up to the base of the third tread. The process to take out the treads & risers was relatively easy, notwithstanding the fact that all the components (including wedges) had been originally glued into place with PVA. We were also tiling all of the bottom floor of the house, so decided to get that done prior to completion of the stair modification. Luckily, the newel post seemed to have very little glue in the joint to the stringer and came apart fairly easily, leaving a nice neat mortise-slot on the post. We fixed some solid framing to the concrete/tiled floor using primed 140x35 pine as the straight risers and then shaped the new bottom winder-tread out of a piece of 35mm laminated pine panel purchased for the project. We cut the radius sections for the curved section of the riser out of an off-cut of the pine-panel. We used a double layer of 3mm craftwood to curve around the radius section of the riser, installing & glueing each layer separately. It would have been nice to have a band-saw on site but all of the curved work was just done with a jigsaw. We could then build the 2nd tread/riser on top of the bottom tread using the same techniques, although the radius of the second bullnose was much tighter and a little more difficult to curve - even with 3mm Craftwood. The newel post was then carefully refitted back onto the stringer in it's new position and screw fixed. The new stringer tenon slid perfectly back into the original mortise of the newel post, and I used plenty of adhesive on all joints & intersections to avoid any movement or squeaks. We braced the newel post in position overnight while the glue dried to ensure it was 100% plumb. Upon removing the braces & cleaning up adhesive residues etc we were ready for the carpet guy. The end result was a much more pleasing & practical entry, and it looks a little classier as well. All in all about 1 1/2 days work for a good carpenter and minimal cost for the laminated pine-panel and adhesives, fixings etc. |
|
1 Comment
8/8/2023 12:05:36 pm
Thanks for sharing about stairs. I love how you write this topic. I really want to a lot of things in this area.
Reply
Leave a Reply. |
AuthorWrite something about yourself. No need to be fancy, just an overview. Archives
May 2021
Categories |
 RSS Feed